Cold Plunge
Here's how I built my fast, quiet, wifi-enabled Cold Plunge.
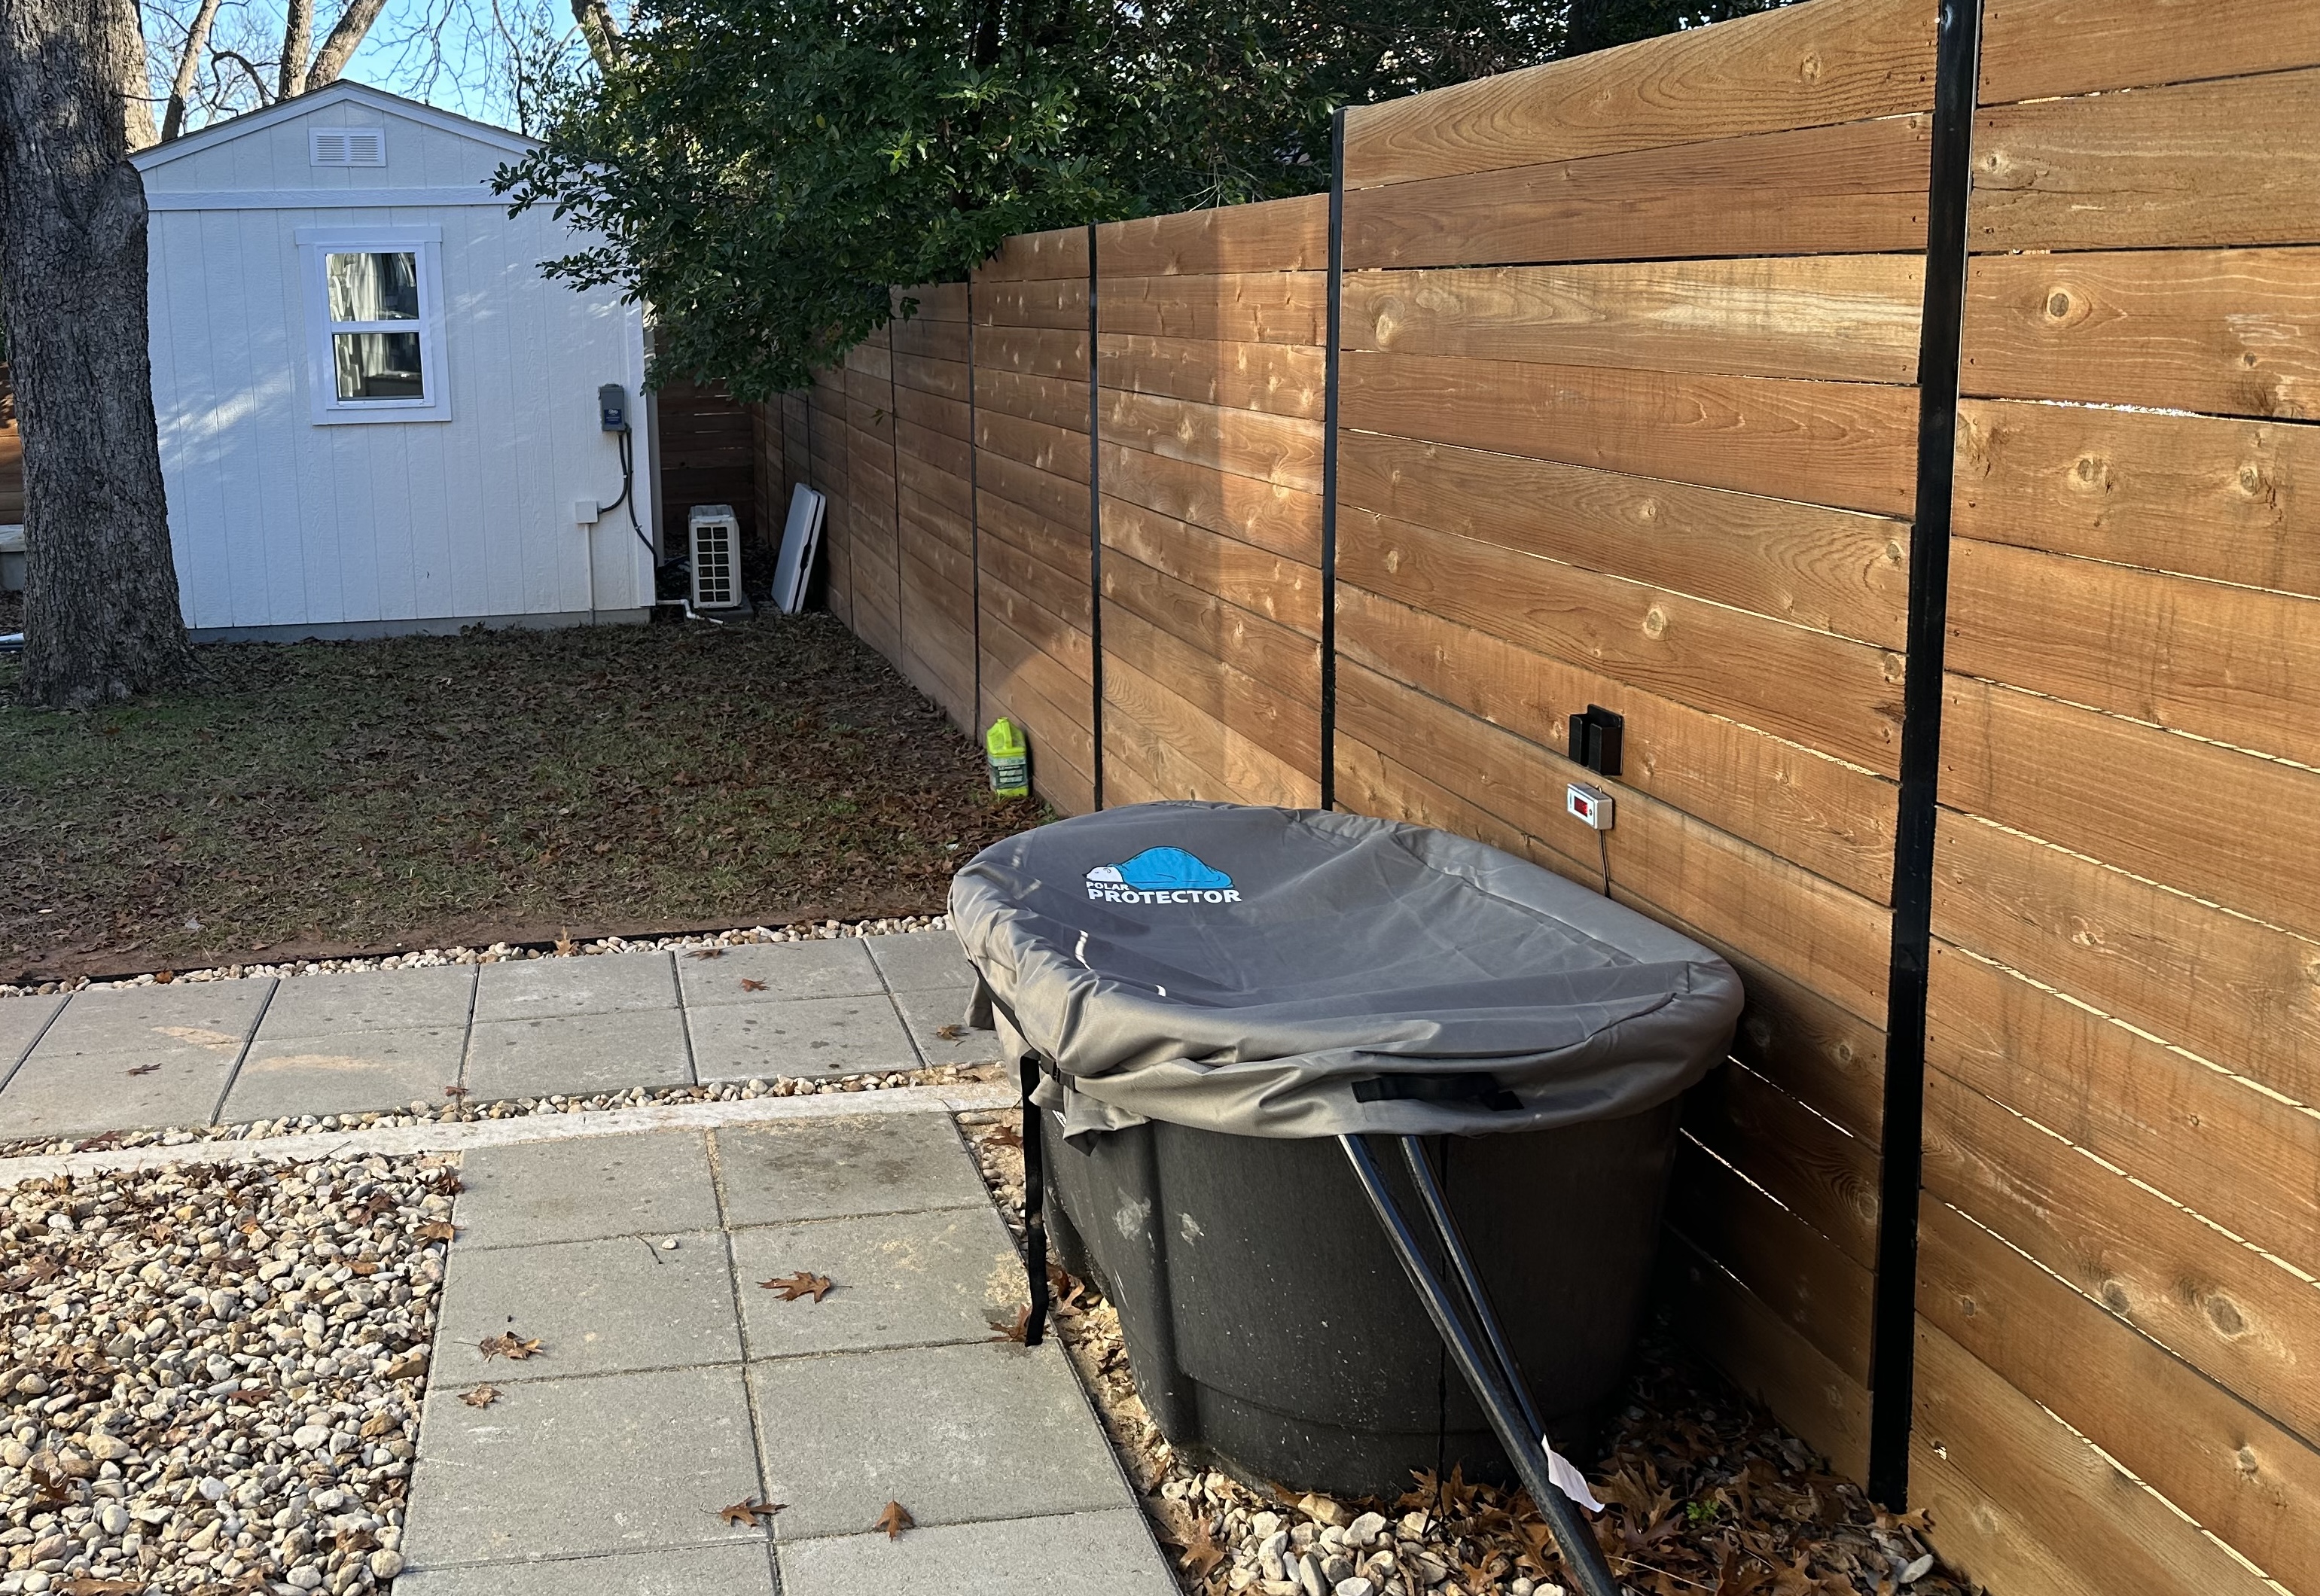
The list below looks intimidating, but the assembly is easy once you have the parts. Planning is 99% of the work.
Why Build Anything?
You can get the same effect with a simple tub + bags of ice, but it's way easier to flip a switch (or yell at Siri).
Financially, here's the breakdown:
- 8 bags of ice (to get 40 degrees F) = $16
- Upfront cost of DIY chiller system = $2000
- Electricity per-use of DIY system = $0.22 (which is negligible)
- 125 uses = breakeven ...but it's also just waaaaay more convenient
I considered a commercial-grade ice machine, my neighbor's deep-freezer, and a bunch of other scrappy options.
I also considered buying a cheap one or an expensive one -- but I was already in too deep, and I knew that I could build a nice one for the price of the cheap one.
... kind-of
Parts
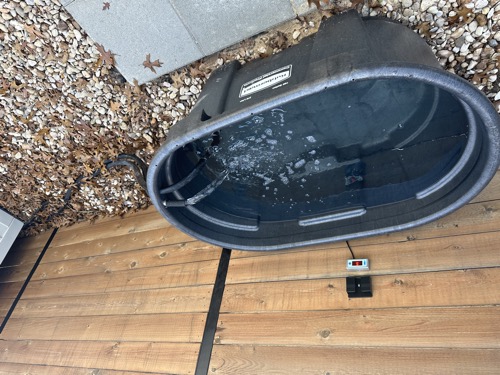
Tub
I went to Tractor Supply Co and personally sat in all the stock tanks. The employees were super helpful -- here's what I learned:
- The Rubbermaid 100 gallon tank is the best. Plenty of room for me (and I'm 6'2")
- The 150 gallon tank is mostly just wider (not helpful), and requires chilling 50% more water.
- The short metal tanks actually seem like a more efficient shape, but apparently they crack in cold weather.
The 100 gallon tank is always out of stock on Amazon, and the shipping is expensive, so it's better to buy this in person if possible.
Chiller
A lot of DIY videos recommend a cheaper one, but the EcoPlus 1HP is great.
- Durable outdoors
- Very powerful (cools fast, down to 36F)
- Has a long cable for the controller (surprisingly useful)
- Plugs in to a standard 120V outlet
- Auto-starts when plugged in (makes automation super easy)
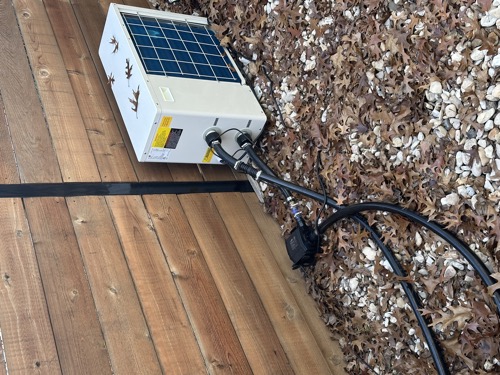
I actually bought this on hydrobuilder, but it took a long time (and shipped on a pallette.). Here are both links:
Pump
Do not use this in submersible mode. That is next-level stupid. Do not electrocute yourself.
If there is a 1% chance of electrocuting yourself, and you have to use this 125 times to break even...
Use it inline. Also, it comes with a 1" input but only a 3/4" output, so you'll need a reducer + a tiny 3/4" tube.
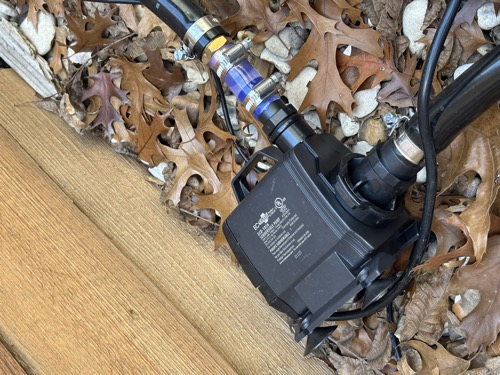
I also bought this on hydrobuilder, but it's a similar price on Amazon:
Filter
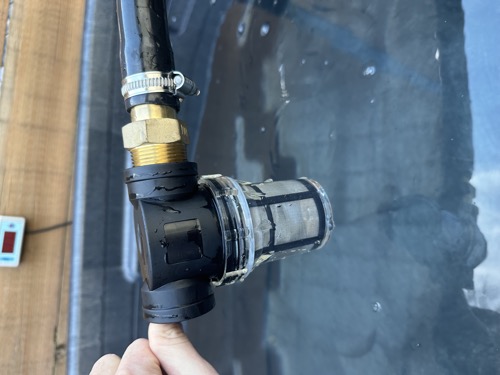
This will extend the life of your system immensely. I clean ours weekly, it's amazing how much dirt it collects.
Check Valve
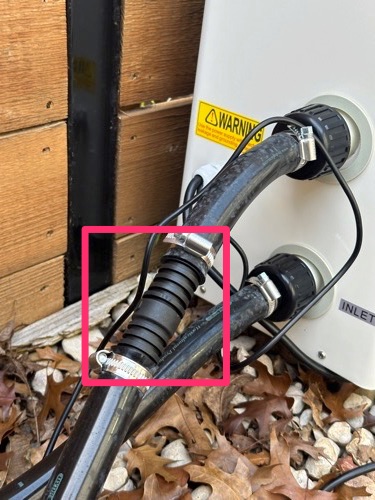
The pump is great once it gets going... but it won't self-prime on start. This means using a hose or your mouth or something to force water through it on each startup...
You can try positioning the pump lower in the system and being careful about all the slopes, but I couldn't figure it out. I could have also removed my "waterfall" feature by submerging the output hose under the surface of the water... but I like the finer things in life.
My favorite solution is to stop the water from draining by putting a 1-way valve in the system (you could actually do this on the input, but I prefer to do it on the output line).
Tubing
1" Tubing is great.
3/4" Would also work for this system, just pay attention to the fittings if you're changing sizes.
I bought a full 100ft because it was the only size in stock -- I thought I needed much less.
But I will say, it's surprisingly nice to have the tub distanced from the pump / chiller. It's completely quiet, plus you still have the continuous flow.
Long tubing also provides more flexibility for rearranging things, and more margin for error if you make a mistake.
Cover
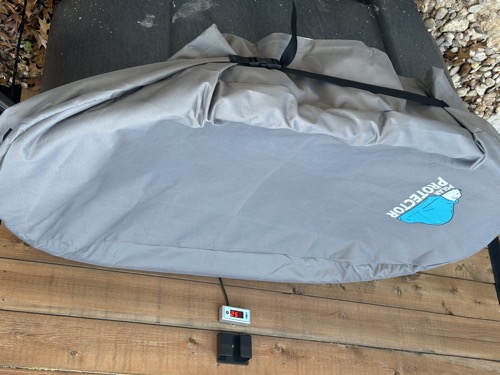
This will reduce the dirt & grime -- you could use a tarp + bungee cords, but I just bought a decent ready-made one. It fits awkwardly given how I drilled holes for the hoses, but it gets the job done:
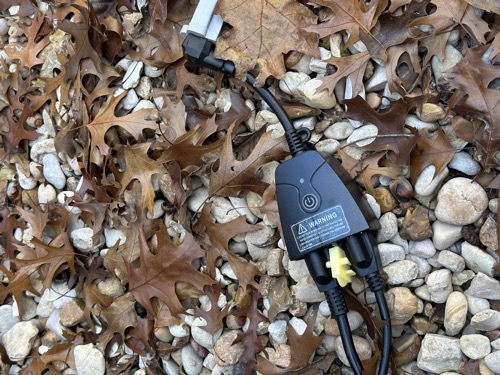
Smart Plug
This makes it 10x easier to use. It's like $20 for this outdoor smart plug, and it lets you tell Siri (or whatever) to turn your cold plunge on / off.
I set a timer in the mornings so that it cools for an hour before I wake up, it's awesome. Just plug the pump + chiller into this.
Tips & Tricks
Videos
I didn't film myself doing this, but here's someone building a spiritually similar cold-plunge. Watch it at 2x to familiarize yourself with pumps / hoses / etc...
https://www.youtube.com/watch?v=Xa52Q0B5_VY
Holes
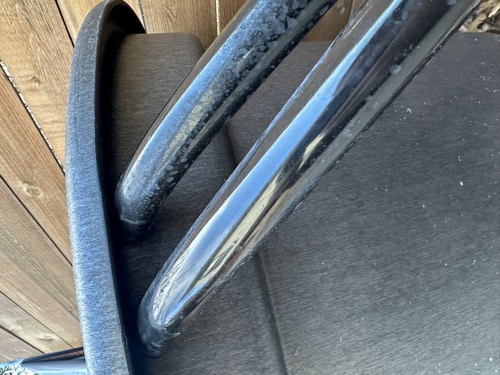
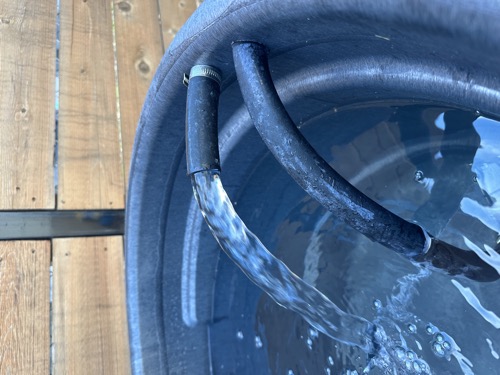
I used a drill to make holes for the hoses. This is way better than having them draped over the edge.
You must drill the holes towards the top to avoid leaks.
For optimal circulation, you want the intake to be at the bottom (like a pool drain), and the output to be up high. To accomplish this, you should still drill both holes up high, but just pull the input hose through longer (and attach the filter to the end of it) so it reaches to the bottom. Leave the output hose shorter (I made mine above the water like a little waterfall).
I used an additional ring clamp on the hoses so they wouldn't slip out. The hoses were super-tight anyways, though (I had to wiggle the drill bit around to make slightly bigger holes so they'd fit).
Sanitization
I dump a tiny, tiny, tiny amount of hydrogen peroxide in whenever someone gets out (and circulate for at least 30 seconds).
I also just drain it & refill weekly -- there's a plug at the bottom of this stock tank, and 100 gallons of water is around $0.50.
Phone Holder
You can see in some of the pictures, I mounted a $3 Amazon plastic phone holder just above the temp dial on my wood fence. It's a nice touch, and makes timing / music way easier.
Solid Ground
Don't install this on grass / dirt. Your feet will be super muddy & track all kinds of gunk into your cold plunge.
Vibes
Give yourself a decent view of a tree or something, don't just face your wall (or electrical panel).

